
Sialkot, Pakistan  |  ISO 13485:2016 & ISO 9001 Certified Manufacturer [email protected] +92-524-263953
0%

Choosing Orthopedic Bone Surgery Instruments is not just a matter of comparing product catalogs. The right instruments must suit the procedure, the patient, and the surgical team’s routine. A drill that feels balanced in the hand, a retractor with a clear working angle, and a dependable sterilization process can all affect preparation and workflow. Small details matter.

The need for sound instrument choices sits within a substantial global health burden. The World Health Organization’s musculoskeletal conditions fact sheet estimates that about 1.71 billion people worldwide live with musculoskeletal conditions. This figure covers many conditions, not just those treated with bone surgery, but it helps explain why orthopedic care matters. The Lancet Commission on Global Surgery estimated that 143 million additional surgical procedures were needed annually in low- and middle-income countries. That estimate covers surgery broadly, rather than orthopedic procedures alone.

For buyers, these reports offer context, not a shopping list. Selection still depends on the intended operation, instrument material, ergonomics, compatibility with imaging or implants, cleaning requirements, and the manufacturer’s service support. Check how a tool performs in real handling, not only how it looks in a brochure. A catalog can mislead. Even experienced teams may find that a technically sound instrument is awkward in daily use. This guide outlines practical questions to ask before choosing, so clinicians and procurement teams can assess function, reliability, and value with care.
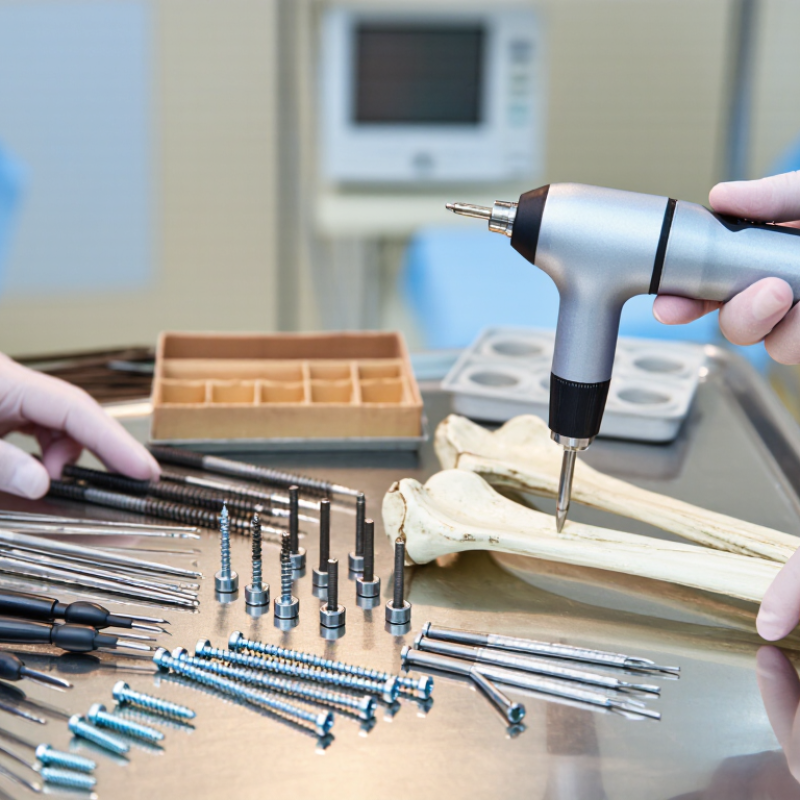
How to Choose Orthopedic Bone Surgery Instruments?

Identify the Procedure and Surgical Requirements

Begin by identifying the exact operation and the bone involved. Fracture fixation, joint replacement, and bone grafting each require different instruments. The surgical approach also matters: a narrow incision may call for compact tools, while a larger exposure can allow broader access. Discuss the plan with the surgical team, including the intended fixation method and any imaging or guidance equipment needed. For example, a procedure involving screws may require suitable drills, depth gauges, and drivers. Small details matter.

Consider the patient’s anatomy and bone quality when selecting instrument sizes and designs. Soft or fragile bone may need careful handling, while dense bone can require instruments suited to controlled cutting or drilling. Match the tools to the procedure, and check that components work together as intended. Confirm that instruments can be sterilized and inspected according to facility protocols, and that the required sizes are available in the tray. Plans can change. A checklist helps the team verify key equipment, though it cannot predict every challenge. If an instrument’s purpose or compatibility is unclear, resolve that before the procedure rather than relying on guesswork.

Match Instrument Types to Bone Anatomy and Surgical Tasks

Instrument choice starts with the bone and the task, not simply the tray label. Dense cortical bone in a long-bone shaft may require controlled drilling and, when planned, reaming. Cancellous bone near a joint behaves differently; aggressive cutting can remove useful support. Small bones often call for finer tips and lighter, measured force. Less is often safer.

Match each instrument to its job. Reduction forceps hold fragments in alignment, while bone-holding forceps need jaws that grip without crushing the surface. Osteotomes and rongeurs shape or remove bone, but they are not interchangeable. A depth gauge helps confirm screw length after drilling. Plates, screws, and drills must also be compatible with the planned fixation method. That detail matters.

Anatomy varies, even when an image looks familiar. Fracture pattern, bone quality, surgical access, and nearby soft tissue can all change the selection. In practice, the choice can feel less tidy than a catalog suggests. A standard set may not suit every case, and instrument condition matters: worn cutting edges or loose handles can affect control. The surgical team should confirm selections against the procedure plan and the patient's anatomy.

How to Choose Orthopedic Bone Surgery Instruments? — Match Instrument Types to Bone Anatomy and Surgical Tasks
Bone Anatomy or Site Typical Surgical Task Relevant Instrument Types Selection Considerations Practical Note
Long-bone shaft
Thick cortical bone, such as the femoral or tibial diaphysis
Make a controlled bone cut, prepare a canal, or shape a fracture site Oscillating saw with an appropriate blade; drills and reamers; osteotomes for controlled cutting Match blade or instrument size to the planned cut and available exposure. Consider access, bone thickness, and the need to limit heat during powered cutting or drilling. Use irrigation and intermittent cutting or drilling as appropriate to help manage heat. Confirm the intended depth and direction before advancing.
Cancellous bone and metaphysis
Trabecular bone near the ends of long bones
Remove loose tissue, shape a cavity, or collect bone graft Bone curettes; rongeurs; gouges; graft-harvesting instruments Choose a working-end size and shape that fit the target area. Smaller or more delicate instruments provide greater control in confined spaces. Cancellous bone is less dense than the cortex, so use controlled force to avoid removing more bone than intended.
Small bones of the hand and foot
Compact anatomy with limited working space
Make precise cuts, remove a small bone fragment, or prepare a joint surface Fine osteotomes and chisels; small rongeurs; narrow curettes; fine-blade saws Prioritize instrument scale, visibility, and control. Confirm that the working end fits the planned site without obstructing adjacent structures. Use careful, incremental movements; the small size of these bones leaves less margin for unintended removal.
Joint surface and subchondral bone
Bone immediately beneath articular cartilage
Prepare a bone surface or remove a limited amount of damaged bone Fine curettes; small osteotomes; controlled-depth drills or reamers when indicated Select instruments that allow precise depth and surface control. Consider the proximity of cartilage and the intended reconstruction or fixation. Preserve bone stock and avoid unnecessary disruption of the joint surface or surrounding anatomy.
Pelvis and other broad bone surfaces
Large, curved anatomy with substantial variation in thickness
Contour bone, remove a defined segment, or obtain access for reconstruction Oscillating saws; osteotomes; larger rongeurs; bone-holding and reduction forceps Choose instrument length and geometry for the exposure and bone contour. Consider the planned cut path, access, and nearby soft tissues. Use a clearly defined plan for cut location and orientation; broad surfaces can obscure depth and direction during work.
Vertebral bone
Small working corridors near neural and vascular structures
Remove bone for decompression or create a pathway for a planned procedure Fine Kerrison-type rongeurs; curettes; small osteotomes; drills with suitable guides or depth control Favor instruments that provide controlled, incremental bone removal and fit the operative corridor. Consider the proximity of neural structures. Use only with appropriate training, exposure, and procedure-specific safeguards; instrument choice depends on the exact spinal level and approach.
Fracture fragments and mobile bone segments
Irregular surfaces requiring temporary control
Align and stabilize fragments while reduction or fixation is performed Bone-reduction forceps; pointed reduction clamps; bone-holding forceps Match jaw shape and span to fragment size and access. Apply enough control to maintain alignment while avoiding unnecessary crushing or damage. Reassess alignment and soft-tissue position after reduction and before definitive fixation.
Bone graft recipient site
Prepared cavity or surface requiring graft material
Prepare the recipient bed and place or shape graft Curettes; gouges; graft impactors or tampers; bone-holding forceps Choose instruments that fit the defect and allow controlled preparation and placement. The required graft type and handling depend on the procedure. Prepare the site according to the operative plan and avoid excessive compaction that could damage the graft or surrounding bone.
General instrument selection
Any bone site
Choose instruments for a specific procedure and operative approach Cutting, grasping, holding, shaping, drilling, and measuring instruments as required Consider bone density, anatomy, access, working-end size, depth control, compatibility with the planned technique, and instrument condition. Selection and use should follow the surgeon’s training, the procedure plan, and applicable instrument instructions. This table is general educational information, not a substitute for clinical judgment.

Evaluate Materials, Design, and Handling

Orthopedic bone instruments must tolerate impact, torque, and repeated cleaning. Check material specifications, not just polished surfaces. Stainless steel grades commonly used for surgical instruments are covered by ASTM F899; titanium may reduce weight, but its feel and wear characteristics differ. Confirm compatibility with the facility’s cleaning agents and sterilization cycles. A shiny finish alone proves little.

Design affects control at the bone. Inspect the instrument’s tip alignment, joint movement, and grip with gloved hands. A rongeur should open smoothly; a retractor should sit securely without sharp edges catching gloves. Look for joints and serrations that trap soil. FDA’s 2015 reprocessing guidance emphasizes validated, device-specific instructions. WHO’s 2016 guideline review reported 11.8 surgical-site infections per 100 patients in low- and middle-income settings. That figure is not an instrument-failure rate, but it underscores the value of reliable cleaning and handling.

Ask the people who use and process the set to assess it together. Can staff identify each tool quickly on a crowded tray? Does a wet glove slip when applying controlled force? Observe these details during realistic practice, not only at a catalog review. One point is easy to miss: a technically sound instrument can still feel awkward after hours of use. That deserves a second look.

Check Sterilization, Safety, and Regulatory Compliance

When choosing orthopedic bone surgery instruments, assess sterilization and safety alongside cutting or gripping performance. Instruments may contact bone and enter sterile fields, so smooth surfaces, secure joints, and corrosion-resistant materials matter. Request written reprocessing instructions for each instrument. Confirm that the proposed cleaning method and sterilization cycle match those instructions. Autoclaving is not a universal answer. Hinges, cannulations, and narrow grooves can retain soil if cleaning steps are inadequate.

Tips: Check that instrument sets arrive with clear identification and traceability records. Ask how damaged tools are reported and removed from service. Inspect tips, locks, and handles under good lighting. Small details matter.

Review documentation against the regulations and recognized standards that apply in your location. Confirm required approvals, labeling, and manufacturer instructions with your facility’s procurement and sterile-processing teams. A certificate alone may not answer whether a tool suits your procedure or reprocessing equipment. That can be easy to overlook. In practice, staff need time, training, and the right brushes or cleaning accessories to follow instructions consistently. If a step is unclear, pause and seek clarification before the instrument is used.

Compare Durability, Maintenance, and Total Cost

Durability should be judged by more than the instrument’s first impression. Check construction, surface finish, joint movement, and how securely cutting edges meet. Under bright light, inspect hinges and serrations for rough spots that could trap soil or signal wear. A smooth handle matters too, especially during long cases when grip fatigue becomes noticeable. Small details matter.

Maintenance affects both reliability and cost. Confirm that cleaning and sterilization methods match the instrument maker’s instructions and your facility’s workflow. Hinged tools may need careful cleaning around joints, while cutting instruments require regular checks for dullness or damage. Keep inspection and repair records; repeated small repairs can reveal a poor fit for your service. This comparison is not perfectly tidy: staff handling and case volume can change how quickly instruments wear.

Compare the purchase price with the full cost of ownership. Include processing time, inspection, repairs, replacement parts, and the cost of unavailable instruments during servicing. A cheaper set may cost more if it needs frequent adjustment or disrupts tray availability. A spreadsheet cannot capture every handling preference, so gather feedback from the people who clean and use the instruments. Ask suppliers about repair turnaround and parts availability, then compare those details with expected use over time.

How to Choose Orthopedic Bone Surgery Instruments? — Compare Durability, Maintenance, and Total Cost

This illustrative 1–5 planning scale compares reusable stainless-steel instruments, reusable titanium instruments, and single-use instruments. Higher scores indicate greater durability, easier maintenance, or better total-cost value. Scores are qualitative, not clinical test results or quoted prices; actual performance and lifecycle costs depend on instrument design, usage, reprocessing requirements, and local purchasing costs.

FAQS

Why should the exact procedure guide instrument selection?

Fracture fixation, joint replacement, and bone grafting need different tools. The planned incision and fixation method matter too.

How does bone anatomy affect instrument choice?

Dense long-bone shafts may need controlled drilling. Small bones often call for finer tips and lighter force. Less is often safer.

Which tools may be needed for screw fixation?

The plan may call for compatible drills, depth gauges, and drivers. Check that the sizes fit the intended screws.

What is the difference between reduction forceps and bone-holding forceps?

Reduction forceps help align fragments. Bone-holding forceps grip bone, so their jaws should hold securely without crushing its surface.

Can osteotomes and rongeurs be used interchangeably?

No. They serve different bone-shaping tasks. Confirm each instrument’s purpose before relying on it.

What should teams check before using an instrument set?

Inspect tips, locks, and handles under good lighting. Look for worn edges or loose parts. Small details matter.

What should staff confirm about cleaning and sterilization?

Follow the written reprocessing instructions for each instrument. Hinges and narrow grooves can retain soil if cleaning is inadequate.

Are checklists enough to prepare for every surgical challenge?

No. A checklist helps, but it misses things sometimes. Confirm the tools against the plan and patient anatomy.

What if an instrument’s purpose or compatibility is unclear?

Pause and seek clarification from the appropriate team. Guesswork is not a good substitute.

Conclusion

Choosing Orthopedic Bone Surgery Instruments begins with understanding the procedure, the surgeon’s specific tasks, and the anatomical area involved. Different operations may require instruments for cutting, drilling, grasping, shaping, or stabilizing bone, so each tool should suit the intended use and the patient’s needs. Consider how an instrument’s size, shape, balance, grip, and material affect precision and control during surgery.

Before selecting instruments, check that they can be cleaned and sterilized according to the facility’s established procedures, and review relevant safety and regulatory documentation. Also assess durability, inspection needs, repair options, and expected service life—not just the initial purchase price. A careful comparison of these factors can help create a reliable, practical instrument set that supports efficient workflows while prioritizing patient safety.

Evelyn

Evelyn

Evelyn is a dedicated marketing professional with a strong understanding of the company’s products, services, and customer needs. With a background in market research, content strategy, and digital communication, she transforms complex product information into clear, practical, and engaging......
↑